As part of my identity theme this past month, I wanted to doing a painting of the Bride of Christ. I decided to see if I could make the dress out of acrylic paints and mediums. So in my handy dandy journal I gave it a try.
The first picture below with the butterflies is the beginning attempt. It is plainly painted with fiber paste. Then I thought I would experiment more with stenciling with fiber paste, putting acrylic under or over the stenciling, or both. Here are the results:


By far I liked the fiber paste stenciled directly on the page with the acrylic paint underneath. It really made the pattern pop up.
My next challenge was making something similar on canvas. I knew I’d have to paint the canvas first, and I also knew I wanted the dress to look like satin. So I decide to paint the dress first with iridescent fine pearl acrylic paint (Golden).
I wanted the pattern to be more white than the fiber paste is by itself, so I added some Nova Color Titanium White paint to the paste. Then I stenciled the pattern I wanted on the dress.
One dried, I decided it would be fun to add a little sparkle to the pattern so I stenciled some Picket Fence Paper Glaze Luxe Arctic Fox on top. That added the touch I wanted!
Because wedding dresses often have embedded jewels or beads in them, I made some of those in the center of the flower in the stenciled pattern using Rangers Liquid Pearls in White Opal. It really looked like pearls!
Here is the final dress:
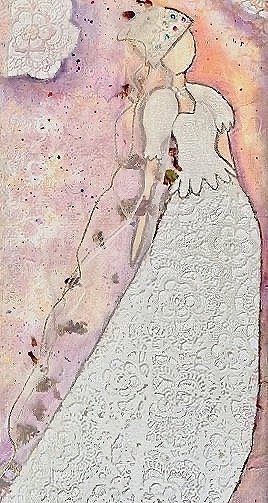
The Final Bride's Dress!
I used a sheer ribbon for the veil and some ribbon (and more liquid pearls for gems) for the hairpiece. Of course she needed a necklace and a liquid pearls were the perfect medium for that. Because there are always flowers with weddings, I added some dried flowers to the painting and that gave it the perfect touch!
More about this Bride of Christ painting is coming in my next post—subscribe here to stay tuned and to receive free shipping + months discount good for the whole month!